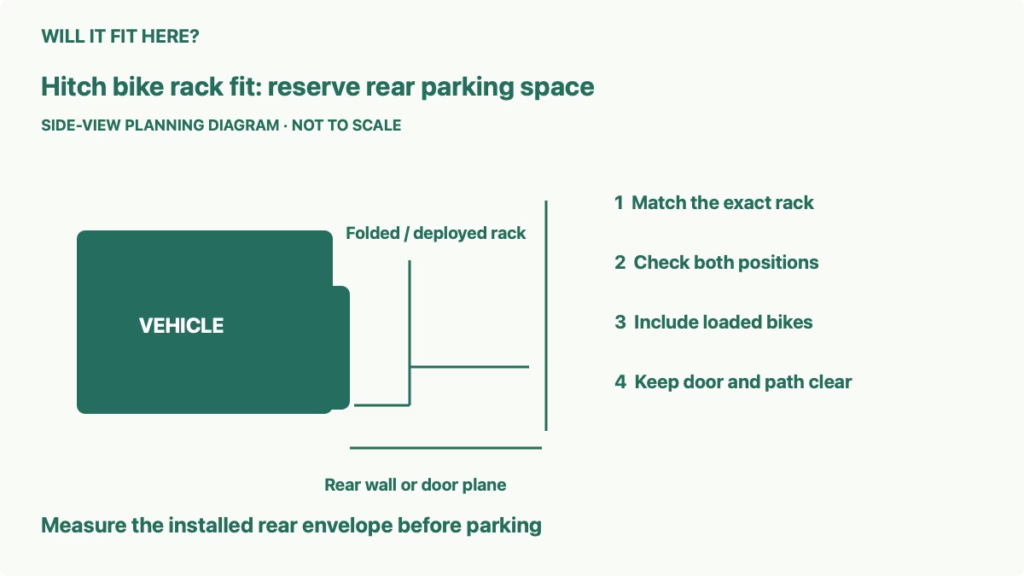
Quick answer: Hitch bike rack fit in a garage depends on the vehicle’s actual parked position plus the installed rack’s rear projection. Measure the folded and deployed arrangements separately, include any loaded bikes, and keep the garage door’s operating area and walking route clear. A vehicle that fits without the rack may need a different parking position or rack removal.
You want to leave a hitch-mounted rack attached between rides, but your garage already has limited front-to-back space. The decision is whether the car and rack can occupy the bay in the state you actually plan to use. This guide covers parking-space measurement after checking the rack’s approved vehicle and hitch compatibility; it does not replace installation instructions.
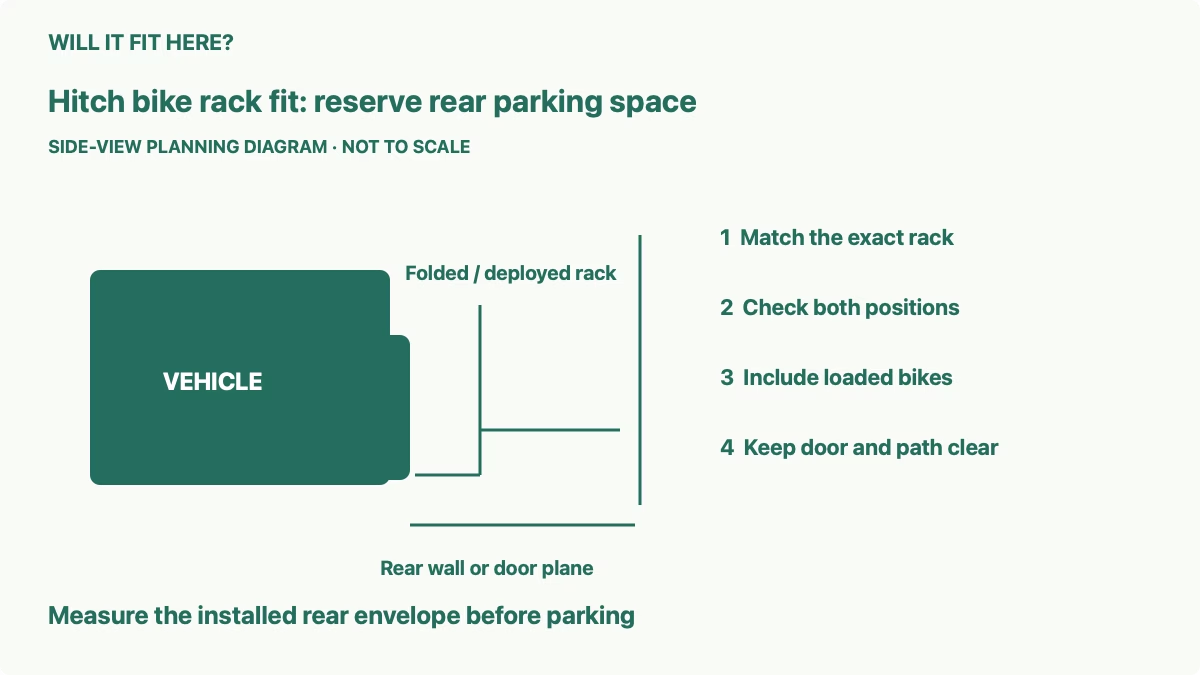
1. Identify the rack state for hitch bike rack fit
Write down the exact rack model, hitch size, number of trays, and any add-on. Decide whether you want to park with the rack folded, unfolded but empty, or loaded with bikes. These are different space checks. The smallest storage arrangement may not be the arrangement you want after returning from a ride.
Thule’s T2 Pro XTR 9034XTR product page identifies the two-bike version for a 2-inch receiver and describes its fold-up and tilt-down functions. The linked technical chart lists 20.5 inches of stowed garage clearance and 41.5 inches deployed for the 9034XT/9034XTR row. Use the reference points illustrated in that chart and the exact model row, rather than treating a product’s overall shipping or storage dimensions as its projection behind your bumper.
The same chart gives a different deployed value when the two-bike add-on is included. This is why an accessory name matters to the measurement. If your rack has extra trays or another approved configuration, find that configuration in the current instructions before comparing it with the garage.
Keep compatibility separate from parking room. A receiver opening that accepts the rack does not by itself verify hitch class, pin-hole position, bumper clearance, permitted loading, or all other manufacturer conditions. Resolve those checks first, then measure the final approved arrangement.
2. Measure the real bay and normal vehicle position
Measure the useful distance between the front obstruction and the rear boundary where the parked setup must end. The front obstruction might be a workbench, freezer, storage shelf, or wall. The rear boundary may be inside the closed garage door rather than at the outside edge of the building.
Include projecting handles, stored items, door hardware, and any area the door needs while operating. Do not use the advertised garage length as the usable bay length. Check the garage door manufacturer’s instructions and obtain professional guidance if the moving-door space is unclear.
Record the vehicle’s actual parked position in the bay without the rack. Measure the remaining rear space from a clearly identified vehicle reference point to the relevant boundary. Use the same reference point when measuring the installed rack; mixing bumper-to-door room with hitch-pin-to-rack length gives an unreliable comparison.
Also check the front space before deciding you can simply park farther forward. A new position may put the nose too close to a workbench, restrict a household doorway, or prevent a cabinet from opening. A useful parking position must satisfy the front and rear conditions together.
| Arrangement | What needs a separate measurement |
|---|---|
| Rack removed | Normal vehicle position and remaining useful rear room |
| Rack folded | Farthest installed projection and any raised tray or arm |
| Rack deployed, empty | Rear extension, side width, and access to the rack mechanism |
| Rack with bikes | Wheels, handlebars, pedals, saddles, and the complete loaded outline |
| Garage use | Door operation, walking path, storage access, and front clearance |
3. Compare installed projection with matching reference points
Where possible, measure the installed rack directly in each approved state with the vehicle stationary in an open location. Use a straight reference line or plumb reference to identify the farthest rear point, then compare it with the corresponding vehicle point used for the available garage space. Follow the rack’s instructions for folding and locking it.
As a fictional example, suppose you measure 28 inches of useful space behind your chosen vehicle reference and 22 inches of installed rack projection from that same reference. Subtraction leaves 6 inches before accounting for any additional operating or access needs. Those example numbers are not Thule specifications and do not establish a universal safe margin.
If the available space is smaller than the projection, the geometry already fails. If it is larger, continue with the other checks. A small positive difference does not prove that the door clears its entire movement or that you can walk around the rack without touching it.
Do not substitute a hitch extension or other unapproved change to solve one clearance problem. Such a change can alter the arrangement’s compatibility and loading conditions as well as its length. Use only configurations approved by the relevant rack, hitch, and vehicle instructions.
4. Add the bikes and check the side outline
The deployed empty rack’s farthest point may not be the loaded setup’s farthest point. Wheels, handlebars, pedals, and saddles can extend in different directions. Measure the bikes in their actual approved tray positions and retention arrangement rather than using the bicycle frame length alone.
Check width as well as depth. A handlebar or wheel can approach a side wall, another parked vehicle, or a storage unit even when the rear clearance looks adequate. Include the route needed to walk around the car and to load or unload the bikes according to the instructions.
Keep the garage door’s moving area free of the complete loaded outline. Do not use closing the door against the rack or bikes as a clearance test. Establish the measurements and required operating space before bringing the arrangement into the bay.
Think about the tasks you actually perform in the garage. If you remove a bike before parking, measure that workflow’s final state. If the bikes remain attached, check access around that state. A garage layout that works only after unloading is different from one that accommodates a loaded rack.
5. Choose a repeatable parking plan
Use a taped floor outline or a dimensioned sketch to compare the approved rack states with the bay. Mark the front obstruction, the vehicle reference, the installed rear endpoint, and the required door area. Keep each measurement’s reference point written beside it so another household driver can understand the plan.
If leaving the folded rack attached works, confirm that the fold operation and locking mechanism remain accessible in the intended location. If parking loaded fails, plan to unload in a suitable open position before entering. If no approved rack state fits the bay, compare rack removal and storage instead of forcing a marginal arrangement.
Record the final state and the remaining usable room. This is a planning result, not a driving clearance guarantee: the approach, vehicle position, bike configuration, and stored objects can change. Recheck the arrangement when you change the rack, add trays, use a different bike, or move garage storage.
Common questions
Can I add the rack’s listed length to my car’s listed length? Only when you understand both measurements’ reference points. Direct installed measurements or the manufacturer’s illustrated garage-clearance method are more useful than unmatched dimensions.
Does folding the rack prove it fits? No. Measure the folded rear projection and check door movement, side space, and access.
Do loaded bikes use the same outline as the empty rack? Not necessarily. Measure the complete loaded arrangement.
For room beyond the parking outline, see our guides to SUV liftgate movement inside a garage and garage freezer access and lid clearance.
Official sources and limits
Checked October 7, 2026: Thule T2 Pro XTR 9034XTR product information and its linked technical fit chart, including the garage-clearance diagram on PDF page 4. Model-specific chart values do not guarantee your installed or loaded dimensions. No firsthand parking test or universal clearance allowance is claimed.