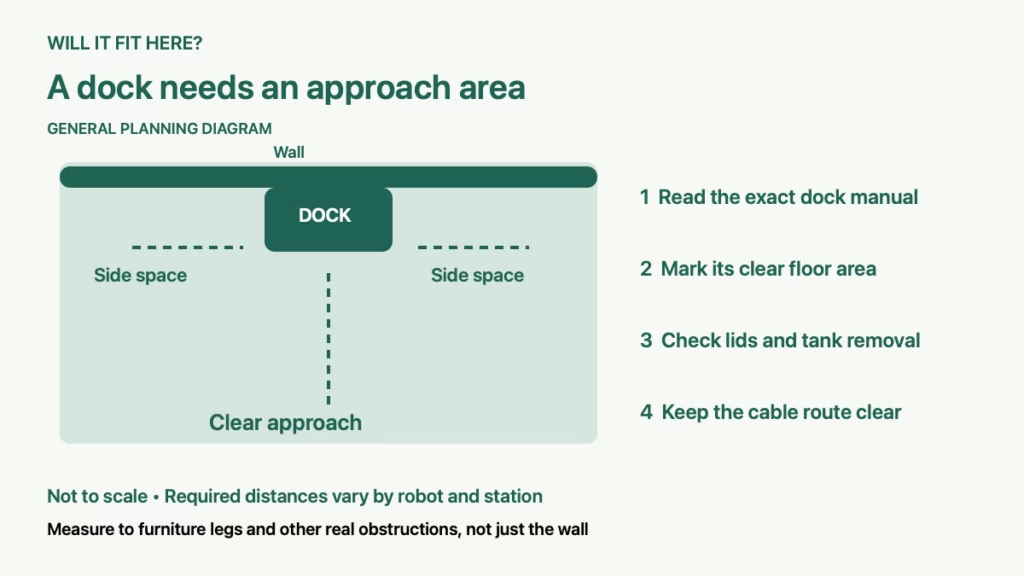
Quick answer: A robot vacuum dock needs more room than its plastic base occupies. Check the exact dock manual for side clearance, a clear approach in front, distance from stairs, and access to lids or tanks. A gap beside a sofa can fit the dock body while still being a poor place for reliable docking.
This guide is for the owner who has picked a discreet charging spot but is unsure whether the robot can return to it. The measurement method is general. The numerical example below applies to the iRobot Roomba Home Base guidance linked in Sources; do not transfer those distances to every self-emptying or mop-washing station.
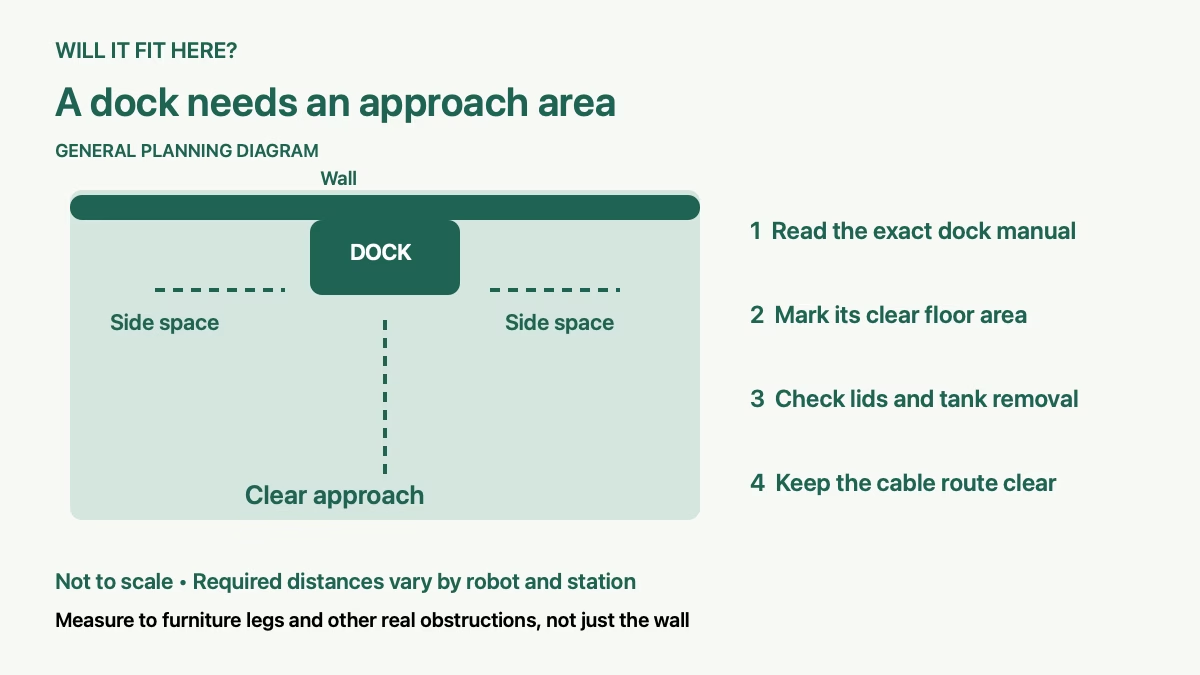
1. Identify the robot vacuum dock before measuring
Write down both the robot model and the dock model. A simple charging base, a self-emptying tower, and a station with removable water tanks have different shapes and service needs. Use the installation or placement section of that exact manual, rather than a seller’s photo of a similar robot.
Make a short worksheet with four entries: body width and depth, required side space, required front space, and required overhead or removal space. Add the manual’s restrictions for the surface, nearby stairs and power connection. If a value is missing, ask the manufacturer instead of treating the missing number as zero clearance.
2. Mark the approach area, not just the dock footprint
For its Roomba Home Base, iRobot recommends at least 1.5 feet (0.5 m) at each side, 4 feet (1.2 m) in front and between the base and stairs, and 8 feet (2.4 m) from Virtual Wall barriers. It calls for a level surface, the base flat against a wall, an uncluttered location and consistent Wi-Fi coverage. These are Home Base placement recommendations, not universal dimensions for robot docks.
Mark the dock’s outline on the floor with removable tape, then mark the manual’s clear area outside that outline. Measure to the nearest real obstruction: a sofa leg, cabinet corner, hanging curtain or shoe rack. Measuring to the wall behind an obstruction gives an optimistic result that the robot cannot use.
For a side-clearance worksheet, the useful expression is dock width + left clear space + right clear space. For depth, record the dock’s body depth and the required clear approach separately. Check the manual’s drawing to see where its arrow starts before adding numbers. Some dimensions are measured from the front of a station; others describe a whole installation area.
3. Test the robot vacuum dock in everyday room use
A charging spot can appear open while the dining chairs are tucked in and become crowded after dinner. Put the chair, door, waste bin and other movable items where they normally end up. Check the approach area with the nearby door fully open and with the curtain hanging naturally.
For example, suppose a station fits beside a console but a chair crosses its marked front area whenever someone uses the desk. The useful decision is to move the station or the chair’s normal parking place. The fact that the station can be pushed into the gap does not solve the approach conflict.
Keep the planned location away from a stair edge according to its manual. Do not use successful docking once as evidence that the manufacturer’s stair-distance requirement can be reduced.
4. Allow room to service the robot vacuum dock
Look beyond the floor plan. Can you lift out a water tank, open the dust-bag lid and reach the parts that need regular cleaning? A shelf above the station may clear its closed height while preventing a tank from being lifted vertically. Measure the full removal movement, including the space for your hand.
Check that the power connection can follow the permitted route without a cable crossing the approach area or being trapped by furniture. Leave access to the outlet and follow the manufacturer’s power instructions. If the only suitable position would require a new outlet, use a qualified electrician for that work.
5. Verify the robot vacuum dock after setup
Install the station as directed, complete the model’s mapping or setup process and use its normal return-to-dock command. Observe the approach with the furniture in the arrangement you measured. Check that the station stays where it belongs and that the robot returns without repeatedly striking an obstruction.
If the robot struggles, recheck the location and the troubleshooting instructions before changing hardware or inventing a workaround. A failed return can involve signal, mapping or charging contacts as well as physical clearance. Moving the dock may also require a model-specific map update.
Common questions before choosing the charging spot
Can the dock go under furniture? Only if the exact manual permits that placement and you can preserve its approach and service space. An open shelf and a closed cabinet are different situations.
Is a narrow hallway a good location? Measure both the robot’s approach and the household’s passage. A station that meets its manual can still occupy the walking route or interfere with a door.
Will a larger mop station fit where my old base stood? Remeasure it. Tank removal and front-ramp space can change the usable footprint even when the robot itself is similar in size.
Sources and related fit checks
Manufacturer reference: iRobot: where and how to place a Roomba Home Base. Check your exact robot and station manuals for different requirements. Source checked October 6, 2026.
For nearby furniture conflicts, see our recliner full-motion clearance guide and coffee table and walkway fit checks.