Quick answer: An LED strip layout fits when the lit sections, approved cut points, connectors and power lead all match the intended route. Measure the route before peeling adhesive or cutting. A strip that is long enough can still fail at a cabinet gap, a tight corner or a connector that will not fit inside the chosen channel.
This guide is for someone adding plug-in lighting to shelves, a desk or a cabinet and wondering whether to cut, extend or reconnect the strip. It covers physical planning and accessory compatibility. Use the exact kit instructions for installation, power and permitted surroundings; this is not a guide to hardwiring lighting.
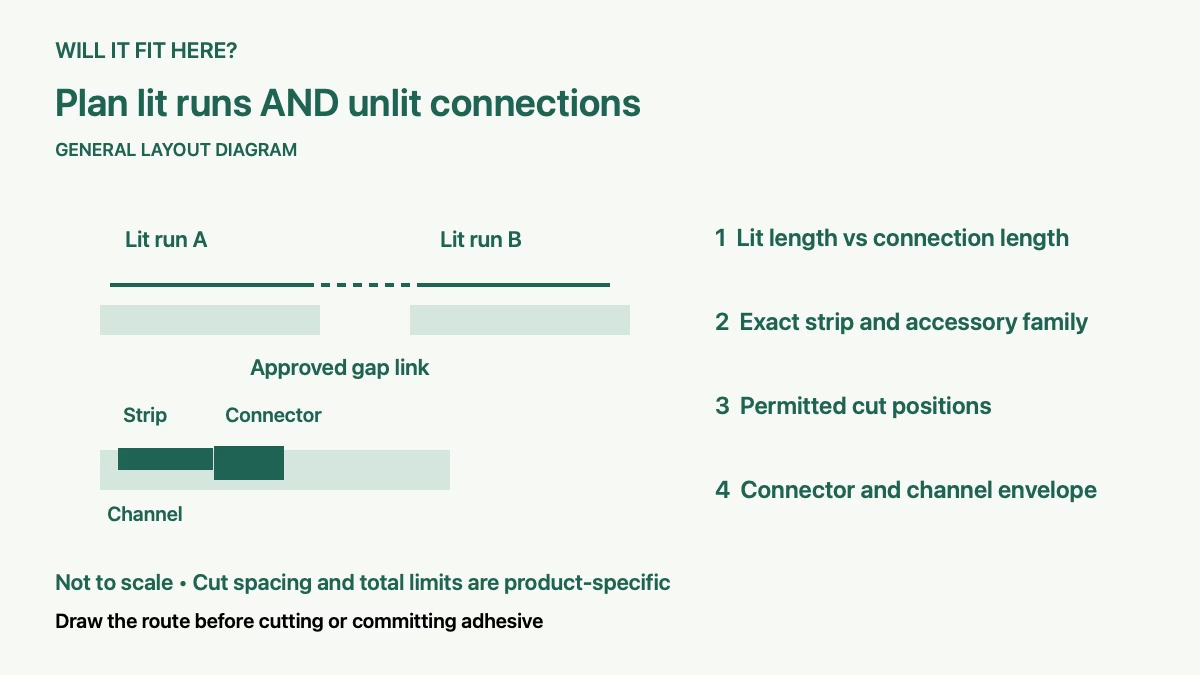
1. Identify the exact kit for your LED strip layout
Record the brand, product family and full kit identifier. Note which power supply, controller and accessories the manufacturer specifies. Similar strip widths or the same number of visible contacts do not establish compatibility. A matching app also does not mean that the physical connectors can be exchanged.
Philips Hue’s current Flux 16ft product, UPC 046677607814, is described as cuttable, extendable and reusable. Its product page lists an overall strip width of 5/8 inch. These are specifications for that indoor Flux product, not every Hue strip. Verify the exact product drawing before choosing a channel that leaves no extra space around it.
Find three separate answers in the instructions: whether the strip may be cut, whether the cut section may be reused, and whether the system may be extended. Permission for one does not establish the other two. If a listing says only “cut to fit,” ask what happens to the removed section.
2. Draw the complete LED strip layout
Sketch each surface to be lit and each gap between surfaces. Measure along the planned installation route rather than across the room in a straight line. Label the start point, corners, cabinet breaks and end point. Include the distance from the available outlet to the controller and strip connection.
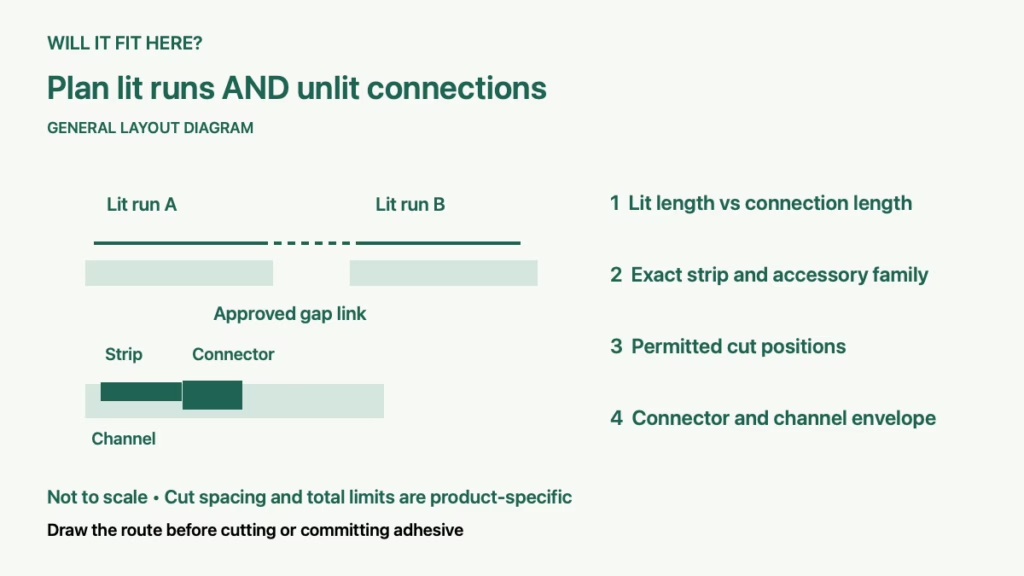
Separate illuminated length from unlit cable length. A gap behind a cabinet does not necessarily need a lit strip, but it still needs an approved connection route. Conversely, a long power lead does not add light along the shelf edge. Keep the two totals distinct on your LED strip layout sketch when comparing a kit’s listed lengths.
For a hypothetical pair of shelves with a gap between them, draw two lit runs and the gap connection separately. Do not add the gap to one continuous strip measurement and assume it can bridge open space as intended. Check whether the manufacturer offers the needed linking accessory and whether it is suitable for that route.
3. Match LED strip layout lengths to approved cut points
Locate the marked cut positions on the actual strip and compare them with the kit’s instructions. The physical shelf length can fall between two permitted positions. Record both the desired endpoint and the nearest approved endpoint before making an irreversible cut.
If the permitted endpoint is shorter than the surface, decide whether that unlit margin is acceptable or whether another kit is better suited. If it is longer, review a manufacturer-approved route or alternate product. Do not cut through an unmarked section merely to make the final length match the furniture exactly.
Disconnect the kit from power and follow its cutting and reconnecting instructions when making any permitted modification. Keep track of which cut pieces can be reused and which specific connectors they need. Do not infer a universal cutting interval from photos of a different strip generation.
4. Allow room for connectors, corners and channels
Check the assembled connector’s width, height and occupied length. A narrow strip can fit inside a channel while the connector or end cap does not. Measure the usable internal channel dimensions, then include clips, covers and the manufacturer’s installation movement. A packaging width is not a connector clearance drawing.
Use the approved accessory for a corner or a gap rather than folding the strip into a sharp crease. Philips Hue lists dedicated Flux connectors and separate flex, corner and extension-cable accessories. Match the exact part to the intended connection and confirm the instructions, particularly when a listing’s description or pictures are ambiguous.
Also check what moves nearby. A connector behind a drawer can be struck when the drawer closes. A strip behind a desk can be squeezed against the wall. Keep the installation away from the furniture’s moving or contact surfaces using the permitted layout.
5. Confirm LED strip layout limits before attaching it
Check the manufacturer’s maximum assembled length and permitted extensions, not just the length of the extension in the box. The Hue Flux 16ft extension, UPC 046677608934, lists compatibility with Flux and Flux ultra-bright strips and a maximum extension of 20 m / 65 ft. Confirm how your complete base-and-extension arrangement falls within the applicable instructions; this is not a limit for another product family.
Plan a reachable location for the specified controller and power supply, preserving any required ventilation and access. Use the supplied or expressly approved power components. If the only available route requires altering electrical wiring, consult a qualified electrician instead of modifying the plug-in kit.
Before committing adhesive, compare the whole drawing with the actual assembled parts and perform the manufacturer’s permitted checks. Keep surfaces, temperature and moisture conditions within its instructions. An indoor kit’s successful dry-shelf fit does not establish suitability for outdoors or a wet location.
Questions before cutting a strip
Can I reconnect every offcut? Only when that exact strip and an approved connector support reuse. Do not assume all cuttable strips do.
Can an extension cable replace a lit extension? It can bridge an approved unlit connection route, but it does not illuminate that distance.
Can I use a universal connector? Verify express compatibility and the complete installation requirements with the manufacturer before relying on it.
Sources and related setup checks
Sources checked October 6, 2026: official Philips Hue pages for the Flux 16ft strip, Flux 16ft extension and strip and accessory comparison. For other connected setups, see our window kit and connector checks and measurement guides.