Quick answer: A dishwasher opening fits a replacement only when its narrowest width, lowest usable height and clear installation depth meet the exact model’s enclosure instructions. Check the finished floor and the route into and out of the opening too. A dishwasher advertised as “24-inch” does not establish its required cutout or prove that the old appliance can be removed.
This guide is for replacing a built-in dishwasher in an existing kitchen, especially after new flooring, cabinet trim or plumbing work. It focuses on the enclosure and replacement path. Use the selected model’s installation manual and a qualified installer for attachment, electrical and water connections.
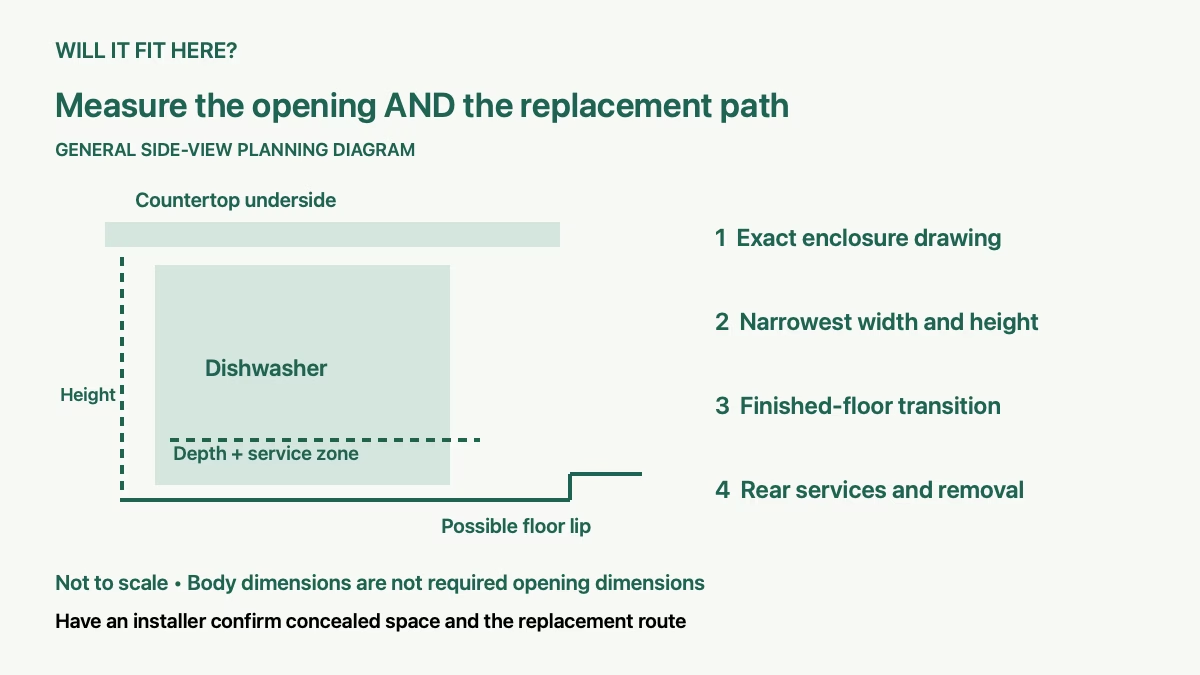
1. Separate dishwasher opening dimensions from body dimensions
Record the complete replacement model number and download its installation instructions. Find the enclosure drawing, height adjustment information and any notes for pans, handles or mounting arrangements. Keep product dimensions in a separate column from the required opening dimensions; they answer different questions.
For a model-specific example, GE lists the GDT650SYVFS body at 34 inches high, 23.75 inches wide and 24 inches deep. The installation instructions linked from its owner support call for an opening at least 24 inches wide and deep and approximately 34.5 inches high. The same instructions include a 33.75-inch minimum-height note for models with the pan described in Step 2. Confirm which instructions and notes apply to your exact appliance. This discontinued model is an example, not a recommendation for a new purchase.
That comparison shows why body width alone is insufficient. Do not substitute a retailer’s nominal size for the installation drawing, or assume every model in a product family uses the same height arrangement.
2. Measure the dishwasher opening at several points
Measure the clear width between the actual inside surfaces at the front, middle and rear where accessible. Repeat at upper and lower positions if cabinet panels are not parallel. The smallest unobstructed measurement matters. A decorative front gap may be wider than the space farther inside.
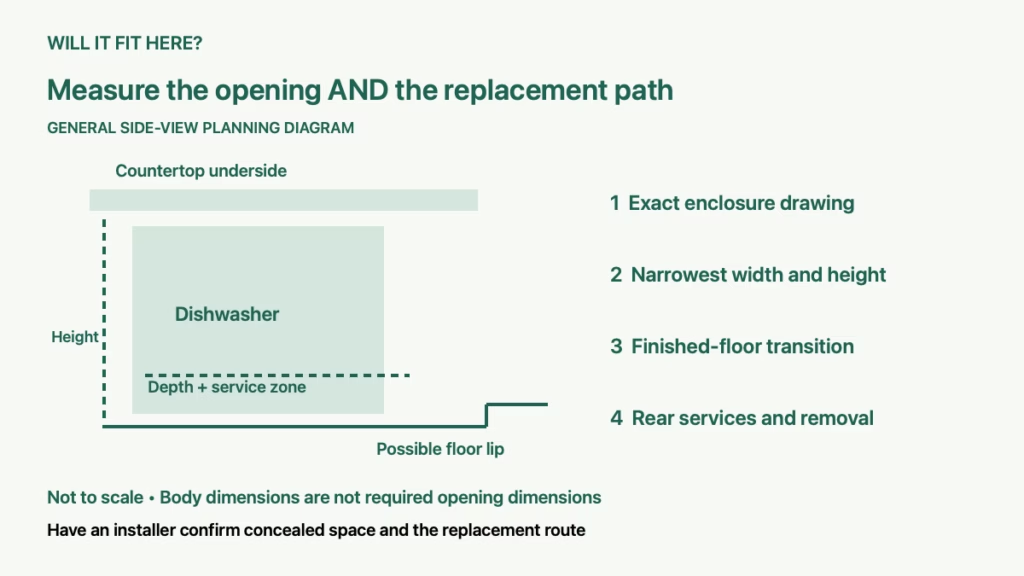
Measure height from the finished support surface to the underside of the countertop and any lower rail or projecting trim. Check the front and the rear as far as you can safely see. Keep the tape vertical, and record the lowest usable height rather than averaging readings.
Check depth against the reference shown in the manual. A wall, pipe, cable, valve or added panel can occupy space that appears available in a simple front-to-back measurement. Do not subtract or add a universal “hose allowance”; use the required service zone and routing for the selected model.
If the old appliance conceals the rear area, mark that portion of the survey as unverified. Ask the installer to check it after safe removal before committing to cabinet modifications or forcing the replacement into place.
3. Check the dishwasher opening against finished-floor changes
Look at the floor immediately in front of the dishwasher and the support surface underneath it. Tile or another floor layer added after the original installation may create a step. A front height measured from the new floor does not describe the older surface hidden under the appliance.
For a hypothetical kitchen, a dishwasher might still operate in its old recess while the new floor lip obstructs its removal. The important questions are whether the old unit can clear the countertop safely, whether the new unit can enter, and which final support height the replacement instructions require.
Photograph the visible transition and record both elevations if accessible. Have the installer assess the extraction and replacement plan. Do not pull the old unit over a lip while it remains connected, remove structural cabinet parts, or assume leveling adjustment will solve an unmeasured obstruction.
Also consider an added countertop edge, cabinet face rail or thick front trim. The installation path must pass through the narrow front entrance even if the cavity behind it is generous.
4. Reserve the specified service and attachment space
The GE instructions in the example distinguish a lower service-entry area from a rear wall area that must remain free of pipes and wires. They also require enclosure at the top, sides and back, with the dishwasher not supporting the enclosure. Those requirements explain why an empty-looking cavity can still fail the installation check.
Show the actual water, drain and electrical locations to the installer and compare them with the selected manual. A connection must not be crushed behind the appliance or stretched to gain depth. Resolve a conflicting service location through the appropriate professional rather than creating a new routing rule from the overall depth.
Check the specified countertop or side-cabinet attachment arrangement as well. Stone counters, damaged cabinet sides and existing brackets may need a different approved solution. Reuse attachment parts only when the replacement instructions expressly support them. This guide does not specify drilling locations or fasteners.
5. Confirm the dishwasher opening and replacement path together
Keep your dishwasher opening measurements in a short installation record: exact model, minimum measured width, minimum measured height, clear depth, floor transition, concealed areas still to inspect, service locations and approved attachment plan. Include photos with the tape endpoints visible so the installer can distinguish a countertop edge from its underside.
Finally, check the delivery route and working room in front of the opening. The installer needs space to handle the unit and make the required connections. Verify the open door and rack access separately; a successful cutout check does not guarantee comfortable everyday loading.
If a measurement fails or remains uncertain, pause the order or arrange a site assessment. Choose another model or an approved modification plan before installation day. Do not describe an unresolved gap as a “tight but probably fine” fit.
Questions before replacing a built-in dishwasher
Will another 24-inch dishwasher fit automatically? No. Compare its exact enclosure requirements, service zones and adjustment information with your measurements.
Should I measure from the floor outside the recess? Record the finished front floor and the support surface under the appliance. A difference can affect both installation height and removal.
Can I count the occupied rear space as usable depth? Only if the exact instructions allow that service arrangement. Have the installer confirm it.
Sources and related measurement guides
Sources checked October 6, 2026: GE GDT650SYVFS product dimensions and its official installation-document page (enclosure instructions, page 3). For another accessory-versus-room distinction, see washer pedestal compatibility and our measurement guides.