Quick answer: Countertop ice maker fit needs the complete appliance footprint, its model’s ventilation clearance and enough room to open the lid or withdraw the bin. Measure from the counter to the lowest cabinet obstruction, then check the space used during filling, serving and cleaning. A closed appliance that slides underneath a cabinet may still be inconvenient or unsuitable there.
You have a gap beside the coffee machine and want to know whether a countertop ice maker can live there. The product’s width, depth and height only describe part of the decision. Build a plan for the stationary body, moving parts, side tank if supplied, required air space and access to remove water or the ice bin.
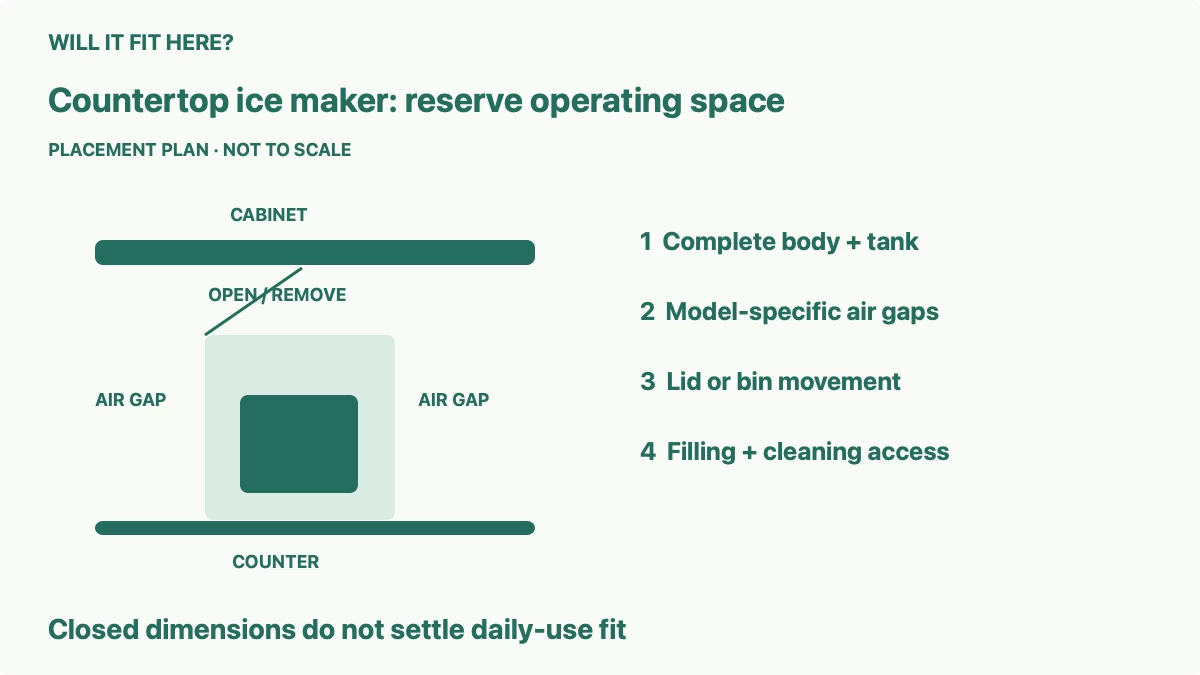
1. Start countertop ice maker fit with the exact model
Record the model number and find its current installation instructions. Product photographs can show an appliance without its side tank or drip tray. Confirm which components are supplied and which you intend to use in the finished location.
The official GE Opal installation page checked for this guide specifies at least 3 inches at the sides and rear for air circulation. It also asks owners to measure between the countertop and cabinet bottom. Treat that as the cited Opal guidance, not a clearance rule for every countertop ice maker.
Use the instruction sheet for your precise model if its requirements differ. Keep the model’s body dimensions and installation gaps on separate lines in the worksheet. A seller’s compact-size description should not replace the manufacturer’s operating requirements.
Check the intended room and support surface. The cited Opal page requires indoor placement and an upright, flat, level support capable of taking the full water-filled weight. It advises avoiding heat sources and direct sunlight. Confirm your own model’s placement conditions.
2. Measure the usable countertop and overhead opening
Measure width between actual obstacles such as the wall, toaster and projecting cabinet trim. Measure depth from the front support edge to the nearest obstruction behind the unit. Measure height to the lowest cabinet lip, light fitting or other obstruction, rather than only to the main cabinet panel.
Include the complete appliance outline. Check feet, control projections, rear fittings, drip tray and any separate tank. If two components sit beside one another, their combined arrangement can be wider than the ice maker’s body dimension.
Use a full-size paper footprint on the counter. Mark the body rectangle, tank location and required gaps as distinct regions. The entire base should be supported as instructed; do not count an overhanging section as usable counter depth.
Record the narrowest readings. A wall or cabinet can vary along the proposed position. If one part of the opening is tighter, compare that point with the corresponding appliance projection rather than averaging the space into a more generous number.
3. Add the required airflow space
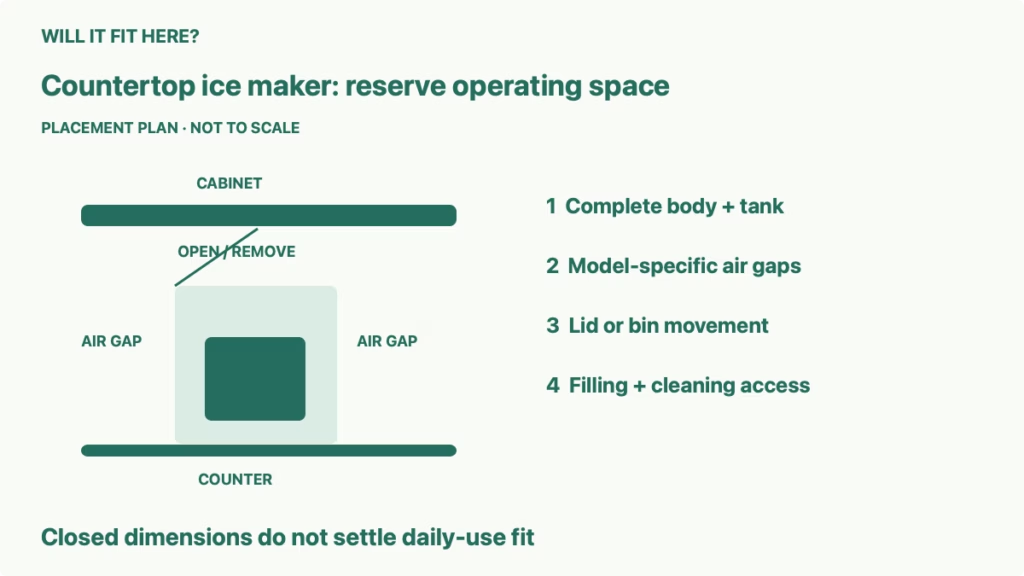
Calculate the occupied width as the complete body or component arrangement plus the required side gaps. Calculate depth using the appliance’s complete rear projection and the required rear air space. Keep any front operating space separate so that the stationary footprint does not hide a serving obstruction.
As a hypothetical arithmetic example, a 12-inch body needing 3 inches on both sides occupies 18 inches before a separate side tank is considered. A 15-inch shelf gap would fail that plan even though the bare body is only 12 inches wide. These invented body dimensions do not describe a specific Opal model.
Do not pack cups, boxes or another appliance into the planned ventilation region. A location that passes when the counter is empty can lose its required air gap after everyday items return. Mark the reserved space in a way that makes the intended arrangement easy to maintain.
The cited GE page notes reduced ice-making rate in an enclosed cabinet because of higher temperature, even with the stated gaps. Review the model’s permitted placement and expected conditions before selecting an enclosed nook. A geometric pass alone does not demonstrate good operating performance.
4. Check the lid, bin and filling movements
Find how your model opens. A top lid swings into overhead space; a removable front bin needs a path out in front; a side tank needs its own removal and refill route. Draw each movement independently from the body rectangle.
If you have the appliance, measure its actual open height or bin-withdrawal distance without forcing a stop. If shopping, request the model’s open dimensions or use its dimensional instructions. Avoid inventing an open-lid height from the closed body height.
Test the intended filling action as a dry planning exercise. Can you lift the water container into the correct position without hitting a cabinet or reaching awkwardly over another appliance? Can the ice scoop reach the bin and return to its designated place?
A countertop location may require pulling the unit forward for access. Check whether the manufacturer permits that arrangement and whether a fully supported, stable access position is available. Do not base the plan on tugging a connected appliance by its cord or allowing it to hang over the counter.
5. Reserve cleaning and service access
Check the manual’s cleaning sequence and component-removal requirements before approving the position. A fitting body can still leave a filter, reservoir or drain access point blocked. Record which parts must be reached and how the appliance gets to an instructed cleaning position.
Keep the cord route clear of moving drawers, hot surfaces and the intended water-handling area. Follow the model’s electrical instructions. If the existing supply location cannot support the approved arrangement, have a qualified professional resolve it; this fit guide does not provide wiring or outlet-modification instructions.
Keep the countertop use practical. Leave room for nearby doors and drawers to move and for the person serving ice to stand. Verify that a temporary cleaning position does not obstruct the normal kitchen route.
Finish with one worksheet for the body, component arrangement, air gaps, overhead opening, moving parts and cleaning access. If any required measurement is unknown, obtain it before purchase. Choose a different position when the operating plan fails, even if the closed unit appears to fit neatly.
| Fit region | What must pass |
|---|---|
| Stationary body | Complete footprint and fully supported base |
| Ventilation | The exact model’s side and rear requirements |
| Overhead opening | Lowest obstruction and any lid movement |
| Serving and filling | Bin, tank, scoop and container movements |
| Cleaning | Required component and service access |
Common questions
Can I use the same gap for every ice maker? No. Match the clearance and operating instructions to the exact model.
Does closed height settle under-cabinet fit? Check the lid or bin movement and the lowest obstruction as well.
Does a bare footprint include the side tank? Verify the complete intended component arrangement.
For another moving-opening comparison, see room-space guides. Browse Installation & Setup guides for separate placement checks.
Official source and limits
Checked October 7, 2026: GE Opal installation and getting started. Follow the current instructions for your exact model. The arithmetic is hypothetical; no firsthand appliance test or universal ventilation value is claimed.