Result — Conditional. The LS650 body can sit on a console while the required image position still fails. Use Epson’s projection-distance reference, vertical offsets and vent-clearance diagram together; a 400 mm deep body does not establish the required console location.
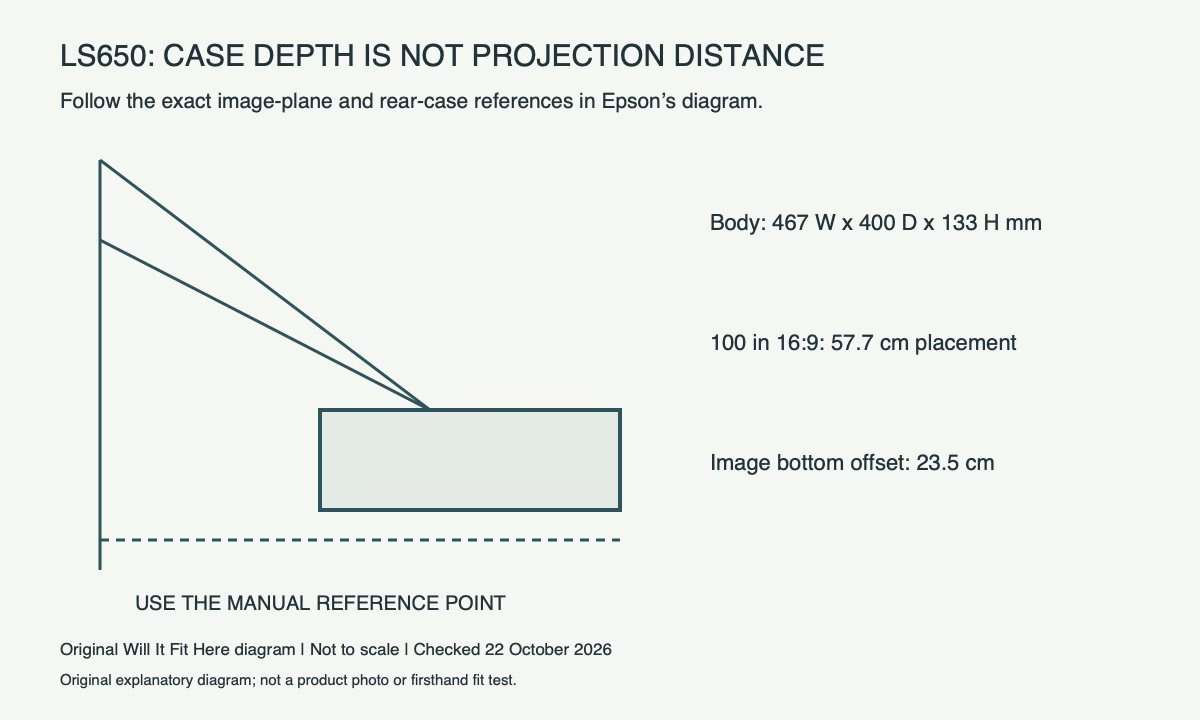
Dimensions: distinguish the cabinet from the light path
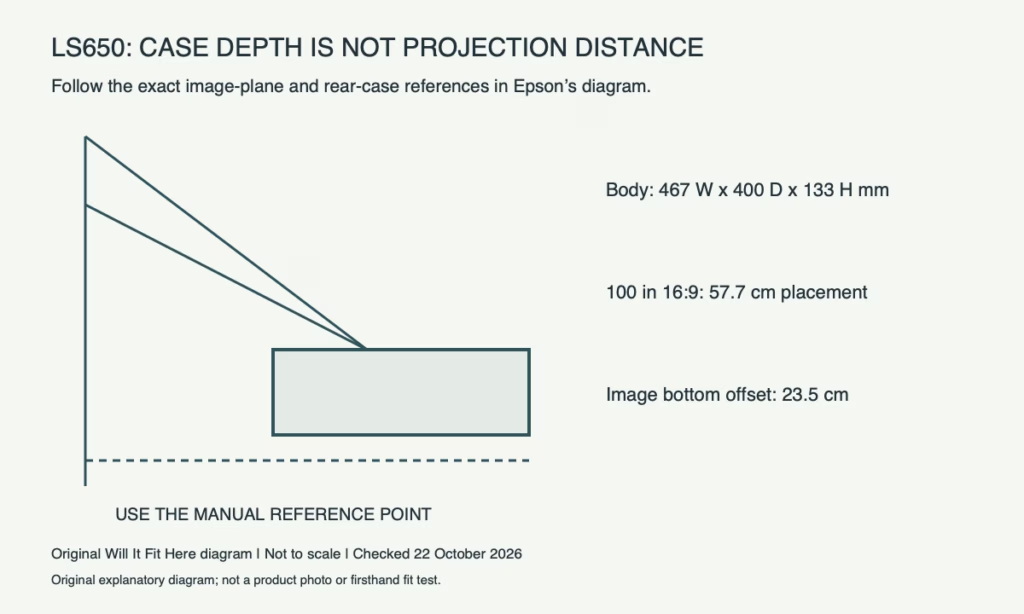
Epson’s US/Canada EH-LS650B/EH-LS650W guide lists a body width of 467 mm, depth of 400 mm and height excluding feet of 133 mm. Its separate projection table describes distances from the image plane to the rear of the projector, with vertical offsets measured from the top. Those references are essential. A distance measured to a console’s front edge, the lens or the wall’s skirting board is a different measurement.
| 16:9 image diagonal | Image to rear of projector | Top of projector to image bottom |
|---|---|---|
| 80 in | 45.1 cm | 17.5 cm |
| 100 in | 57.7 cm | 23.5 cm |
| 120 in | 70.3 cm | 29.4 cm |
These are Epson’s approximate placement values, not a universal wall-to-case gap. Keep the manufacturer’s labelled diagram beside your tape measure. Do not add the full case depth to a distance before establishing which end of the case the reference identifies.
Mark the image plane before moving the furniture
For a screen mounted away from the wall, use the screen surface as the image plane. Mark its intended lower edge with removable tape. Check the horizontal centre line and the available screen width and height, including trim, curtains and speakers. A diagonal alone cannot confirm that the image rectangle clears these objects.
Place a cardboard case outline on the console and mark the reference location from the manual. Check that the complete base is supported in the resulting position. If reaching the desired image would leave the projector hanging over an edge, move or replace the furniture rather than treating the lens adjustment as a substitute for support.
Use the correct vertical reference
For the listed 100-inch 16:9 arrangement, the image bottom is approximately 23.5 cm above the projector top. Epson separately identifies 15.8 cm from the table surface to the projector top in its projection illustration. These figures describe that setup; the 133 mm case height excludes feet. Measure the installed top reference and screen relationship rather than mixing those height definitions.
A high console may push the picture into a ceiling or shelf. Test the intended placement and image shape before fixing a screen permanently. Epson recommends positioning the projector squarely to the screen and adjusting the physical installation for the best image.
Allow ventilation and service access
The installation-space illustration specifies 10 cm and 30 cm clearances at the indicated sides. Apply each number where Epson’s drawing places it; they are not interchangeable generic margins. Keep vents, the projection window and controls unobstructed. This model is not intended for ceiling or wall mounting.
Finally check cable routing, filter access and the route for lifting the unit out. A low shelf that meets the body footprint but traps hot exhaust or blocks the optical path gives a no-fit answer in that operating position.
Before you decide
- Identify EH-LS650B/EH-LS650W and the intended aspect ratio.
- Use the image plane and the manual’s rear-case distance reference.
- Check full base support, screen offsets and physical image alignment.
- Apply the illustrated vent clearances and retain service access.
FAQ
Is a 400 mm deep console automatically enough?
No. It describes the case depth, while image placement, support, cables and ventilation determine the usable installation.
Can I measure projection distance from the lens?
Use the reference specified in this model’s table. Its main placement distance is labelled from the image to the rear of the projector.
Official sources and scope
Specifications and guidance checked on 22 October 2026. The named model and region control; follow the matching current instructions for your product. Worked examples are identified as hypothetical.
- Epson LS650 projection distance table and reference illustration
- Epson LS650 body dimensions
- Epson installation options and clearance illustration