Quick answer: A sewing cabinet fit requires two layouts: the closed storage footprint and the open working footprint, plus a usable seat, foot controller, fabric path, and compatible machine lift. Tape the open outline on your floor before ordering. A cabinet that clears a wall while closed can still block the doorway or leave you unable to sit comfortably when sewing.
This guide is for a small bedroom, shared craft room, or living-room corner where a folding sewing cabinet seems attractive. The decision is whether the exact cabinet and your exact machine can work together in that location without moving other furniture for every sewing session. It covers measurement and shopping checks; assembly, lift adjustment, electrical connections, and machine operation must follow their own instructions.
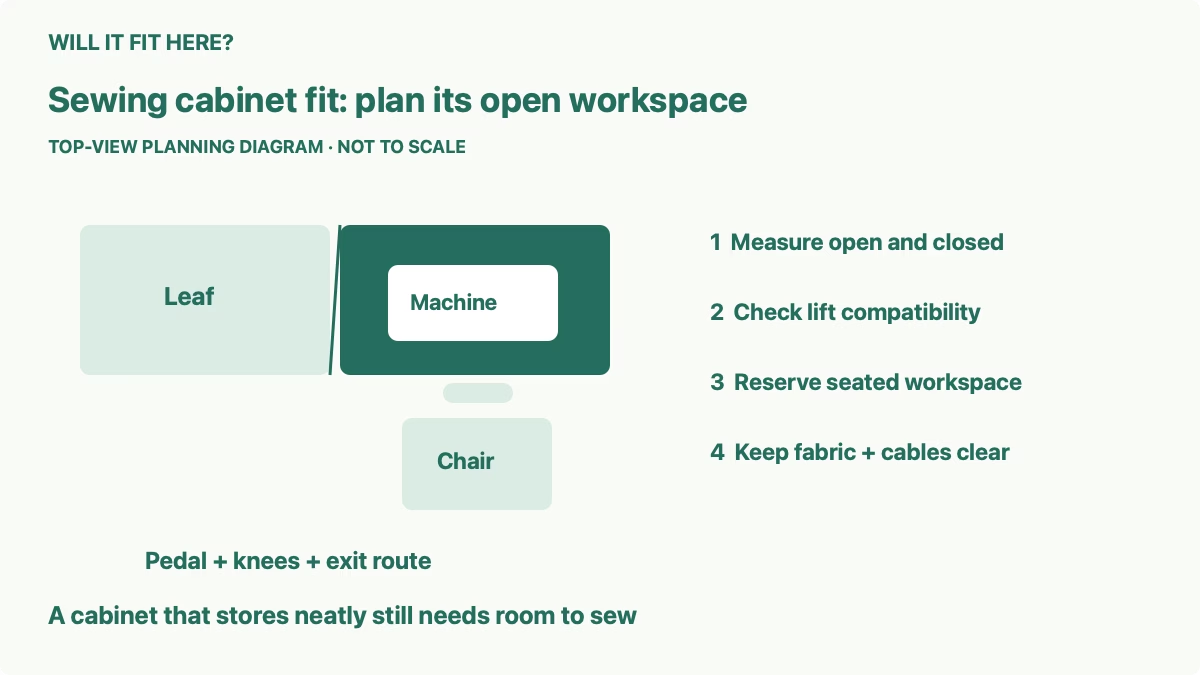
1. Measure sewing cabinet fit in both positions
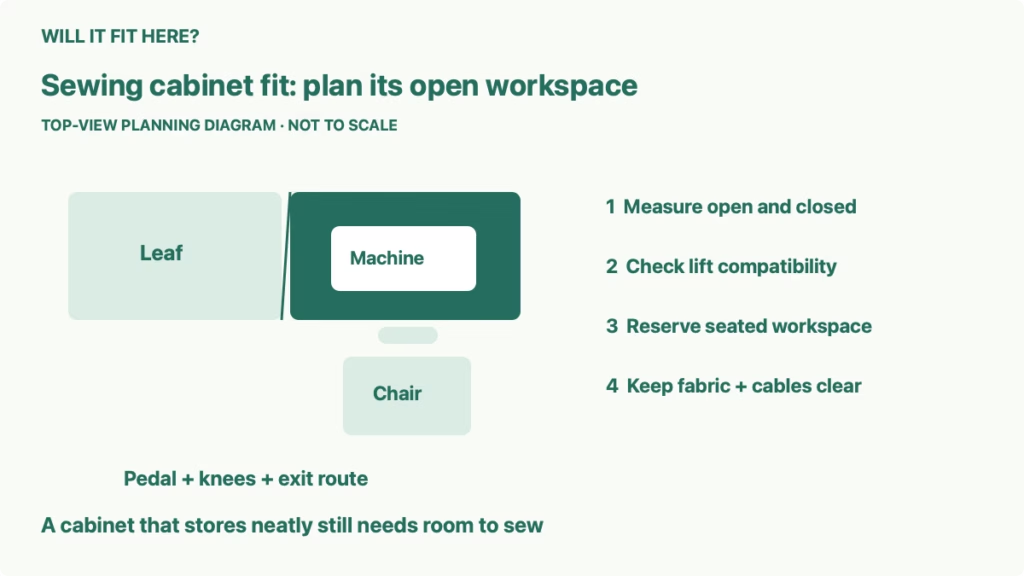
Record the manufacturer’s closed width, depth, and height separately from its open dimensions. Then identify which panel moves, where its support or door sits, and whether that motion passes through another object. A single top-down rectangle does not describe the full opening sequence. Watch for a bed frame, drawer handle, radiator, window ledge, or wall outlet at the same height as the moving panel.
As a model-specific example, Arrow’s official Judy product page lists an open cabinet of 50¾ inches wide by 17¼ inches deep by 29½ inches high. Its closed dimensions are 25½ inches wide by 17¼ inches deep by 30⅛ inches high. Those are the published dimensions for that product, not standard dimensions for all sewing cabinets. The different heights also mean you should check the configuration shown in the instructions instead of treating the folded top as the sewing surface.
The published widths differ by 25¼ inches. That calculation helps explain why a narrow closed cabinet can need considerably more room when opened; it does not establish how much clearance each hinge or support requires. Check the assembly drawing for the actual moving parts.
2. Check the machine, opening, lift, and insert
A machine fitting on top of a cabinet does not prove it fits on the lift or through the opening. Measure the machine’s full body with the accessories that remain attached during storage. Include any handle, side connector, thread stand, extension, and cord plug that projects beyond the basic case. Compare the exact manufacturer’s machine dimensions and weight with the cabinet’s compatibility information.
For Judy, Arrow identifies an A10 lift opening of 20¾ inches wide by 11 inches deep by 13½ inches high and a 55-pound sewing-machine weight limit. These figures are screening checks, not a promise that every machine below them is compatible. Ask Arrow to confirm your specific machine model, including the insert needed for flatbed use, before committing to a purchase.
The platform, insert opening, and stored machine height solve different problems. A custom insert can bridge the surface around a compatible machine, but it cannot make an oversized machine pass through an undersized opening. Likewise, matching width and depth does not settle whether the machine can lower into storage with its connections arranged as instructed.
| Measurement or check | What it decides |
|---|---|
| Closed cabinet outline | Whether storage blocks a door, drawer, or everyday route |
| Open outline and panel movement | Whether the cabinet can unfold fully in its assigned location |
| Machine dimensions and weight | Whether the exact cabinet lift and storage opening are suitable |
| Seat, knees, and foot controller | Whether you can operate the machine in a practical position |
| Fabric, cables, and nearby furniture | Whether a real project can move without catching or obstructing an exit |
3. Reserve a seated working area
Use the chair you actually intend to sew in. Place it at the proposed machine position and check whether you can move close enough without your knees meeting a door, shelf, or cabinet support. Test the foot controller position while seated, with your foot reaching it naturally. Do not assign a universal chair clearance: the required space depends on your chair, body position, and cabinet layout.
Mark the chair’s occupied position and its pull-back position separately. The second position is what lets you stand up and leave the workspace. If a bed or bookcase sits directly behind you, a cabinet that technically fits may still require an awkward sideways exit. Keep the room’s necessary access route usable when the workstation is open.
Working height is another decision. Compare the proposed sewing surface with a setup you already find comfortable, including the machine’s needle area rather than just the tabletop. If you need a different chair height, check that your feet and controller can still work comfortably and that the manufacturer’s intended cabinet configuration permits the arrangement.
4. Check fabric movement, light, and cords
A small fabric sample needs less surrounding space than a garment panel or quilt. Lay out a representative project, or paper of a similar size, beside the intended machine position. Check the feed direction and the area where finished fabric collects. A nearby wall may make a wide open tabletop less useful if the fabric immediately runs into it.
Check task-light placement with the cabinet open. Avoid a layout where opening the leaf blocks the lamp base, hides a useful outlet, or makes the cord cross the chair’s route. Follow the machine’s electrical instructions; this measurement guide does not establish whether an extension cord or outlet arrangement is suitable.
Look underneath as well. The foot-controller cable should not snag a moving support or be pinched while closing the cabinet. Plan how you will disconnect, store, or route accessories exactly as the relevant instructions require. A plug behind the cabinet can add practical depth even when the published cabinet depth looks sufficient.
5. Make an open-and-close trial before buying
Use painter’s tape or removable paper to mark both cabinet outlines. Put a box where the machine will sit, move the chair into position, and simulate the panel movement without loading an improvised support. Check the room door, storage drawers, and walking route in both configurations. Repeat the trial with the project material and lamp you expect to use.
Keep a short list of unresolved measurements for the retailer: exact machine compatibility, suitable insert, moving-panel clearance, and any dimension missing from the product drawing. A confident fit decision requires those answers. If the room only works after moving heavy furniture every time, treat that as a recurring operating requirement when comparing alternatives.
Common questions
Can I use only the closed dimensions when choosing a location? Only for storage. Sewing requires the open cabinet, your occupied workspace, and the opening motion to fit too.
Does the lift opening prove my machine is compatible? No. Weight, shape, connections, storage configuration, and insert requirements also matter. Confirm the exact model with the cabinet manufacturer.
What if the cabinet fits but my chair cannot pull back? Rework the layout before buying. A usable exit from the seated position is part of the fit decision.
For other shared-room checks, see our guides to digital piano and bench space, drop-leaf table opening space, and a queen bed in a 10-by-10-foot room.
Official source and limits
Checked October 7, 2026: Arrow Judy sewing cabinet official product page, Dimensions panel. The listed cabinet dimensions, opening, and weight limit are specific to Judy. The page provides links to its assembly instructions; use the version applicable to the cabinet supplied. This article offers original layout planning advice and has not claimed a hands-on test, universal ergonomic clearance, or compatibility approval for your machine.