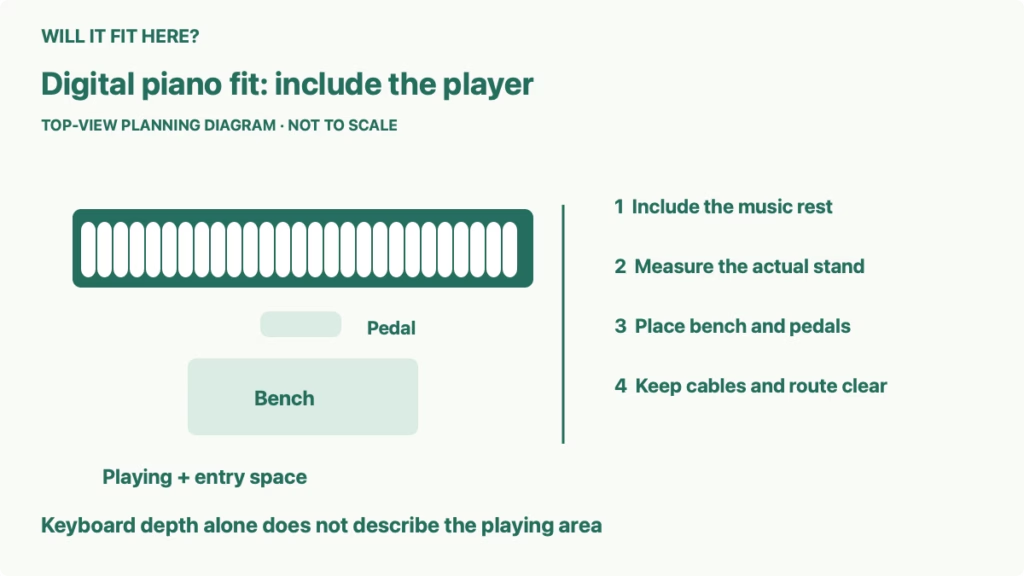
Quick answer: Digital piano fit requires the instrument in its playing configuration, a suitable stand, the bench, pedals and a usable entry route. The keyboard body’s depth is only one part of the space. Include the music rest and connected cables, then sit at a mock-up before choosing a place against a wall or below a shelf.
This guide is for someone buying a portable digital piano for an existing bedroom, study or living room. The decision is whether the whole playing setup works there every day. A keyboard can fit on a narrow plan while its stand feet, music rest or player’s position conflict with the rest of the room.
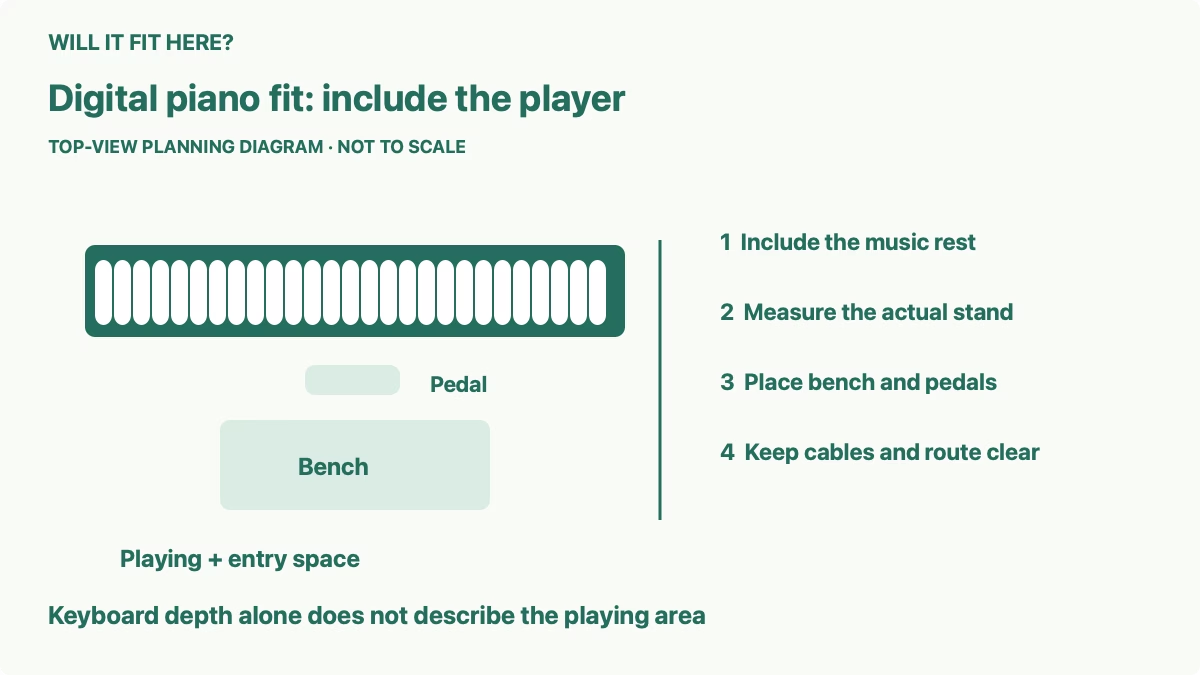
1. Read dimensions for the playing configuration
Start with the exact model and regional specification page. Record the maximum width, height and depth with the accessories you expect to leave attached. Check whether a published dimension excludes the music rest, optional stand or pedal unit. Keep carton measurements separate because they describe delivery rather than the playing setup.
Yamaha USA’s current P-225 specification illustrates the distinction. The instrument is 1,326 mm wide, 129 mm high and 272 mm deep without its music rest. With the music rest, the listed height is 327 mm and depth is 362 mm. With the optional stand, the listed height is 744 mm, or 942 mm with the music rest; depth is 318 mm, or 362 mm with the rest. These figures belong to that model and configuration.
A shallow shelf that clears the bare body may therefore conflict with the rest. Measure the complete configuration from the lowest support point to the highest attached part. If you will use a tablet holder or another accessory, include its actual projection rather than assuming that the manufacturer’s music-rest figure covers it.
| Part of the setup | What to measure |
|---|---|
| Keyboard and music rest | Complete width, depth and height while ready to play |
| Stand | Actual foot spread, installed height and support compatibility |
| Bench and player | Seated position, leg room and entry movement |
| Pedals and cables | Working foot position and connected projection |
2. Check digital piano fit with the actual stand
Choose a stand approved or specified for your exact instrument and use its assembly instructions. A compatible fixed stand and a folding stand can have different floor footprints. The keyboard width does not tell you how far the stand’s feet extend toward the player or wall.
Measure the stand at the height you will use, including its widest feet and any braces. Do not assume a folding stand keeps the same depth at every adjustment. Mark its footprint and the keyboard above it on the floor plan. Check baseboards and wall projections that could prevent the feet from reaching your intended position.
Confirm that the support arrangement leaves your knees and feet usable room. A cross brace or projecting leg may occupy space that appears empty in a top view. If the plan depends on resting the keyboard on an unrelated shelf or furniture item, verify suitability with the instrument’s instructions before treating that surface as a stand.
3. Place the bench and pedals in a usable position
Use your actual bench or a comparable seat to test the arrangement. Sit at the expected keyboard height and place your hands where the keys will be. Adjust the seat position for a natural playing posture. Record the bench’s occupied position rather than only its stored outline tucked under the instrument.
Set the intended pedal or pedal unit where it can be used normally. Include the player’s foot movement, stand legs and the pedal’s connected cable. A loose footswitch and an attached multi-pedal unit need different planning. Yamaha lists optional stand and pedal accessories for the P-225; confirm compatibility for the exact combination you will buy.
Try entering and leaving the seat from the side you expect to use. Check that the bench does not block a door or require someone to step across the pedal cable. If several people will play, repeat the position check for their normal adjustments. Do not force everyone into a cramped arrangement merely because the bare keyboard clears a wall.
4. Reserve connected depth and everyday access
Inspect where power, pedal, headphones and other connections attach. Measure the actual plug and its natural cable bend when connected. Follow the manufacturer’s cable and ventilation guidance; do not press a plug against a wall or sharply bend a lead to reduce the apparent depth.
Keep the route to the bench clear and place cables where normal walking will not pull them. Consider headphone use from the seated position and whether the player can reach controls without shifting the instrument. Leave access to disconnect or service the setup as required by its instructions.
Check the room’s other moving parts with the bench occupied. Open drawers, closet doors and the room door. A piano that fits beneath a wall shelf may still conflict with a hinged cupboard above it or with an office chair behind the bench. Map the actual daily sequence, including someone walking through while another person plays.
5. Test height, delivery and shared-room use
Measure overhead shelves at their lowest projection and compare them with the ready-to-play setup. Include the space needed to place music on the rest and use any folding or removable part as instructed. An object that barely clears the rest can still make it awkward to read or turn a page.
Check the delivery carton and assembly route separately. A package may be longer than the keyboard and need more room at a hallway turn. Confirm where the stand will be assembled and whether the instructions require access behind or beside it. Keep the intended final position available while planning assembly.
For a multipurpose room, decide what will be moved between activities. A portable instrument can be stored, but the stand, bench and pedal still need suitable places. Avoid a plan that leaves loose parts across the walking route. If the setup will stay ready to play, test that permanent footprint against the room’s other uses.
Finish with a sketch showing the complete instrument configuration, stand footprint, occupied bench, pedal position, connected depth and entry route. Resolve any failed check before ordering. Digital piano fit is successful when the player can use the instrument normally, not simply when its width is smaller than an available wall.
Common questions before choosing a piano location
Can I compare only the bare keyboard depth? Include the music rest, stand and connected plugs for the configuration you will use.
Does a compatible stand guarantee that the room works? No. Test the stand feet, seated position, pedal movement and entry route in that room.
How much bench clearance is universal? There is no single figure that describes every player and setup. Use the actual seated arrangement and the exact product instructions.
Sources and related fit checks
Manufacturer reference: Yamaha USA P-225 specifications and optional accessories. Source checked October 7, 2026; confirm your regional model and support instructions.
For another occupied seat in a compact room, see our dining chair arm and tuck-depth checks. For a large recreational setup, use the pool table cue-space guide.