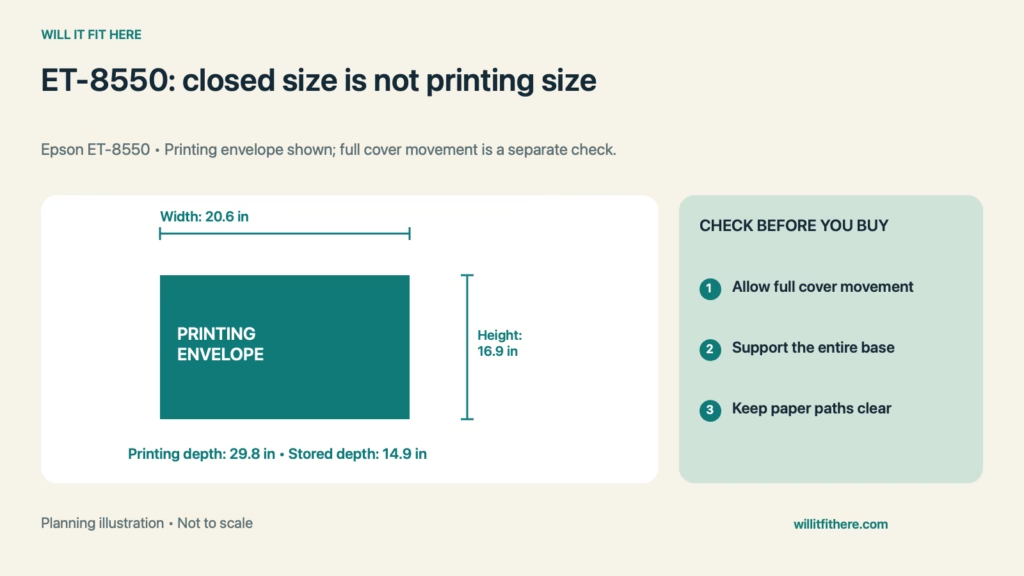
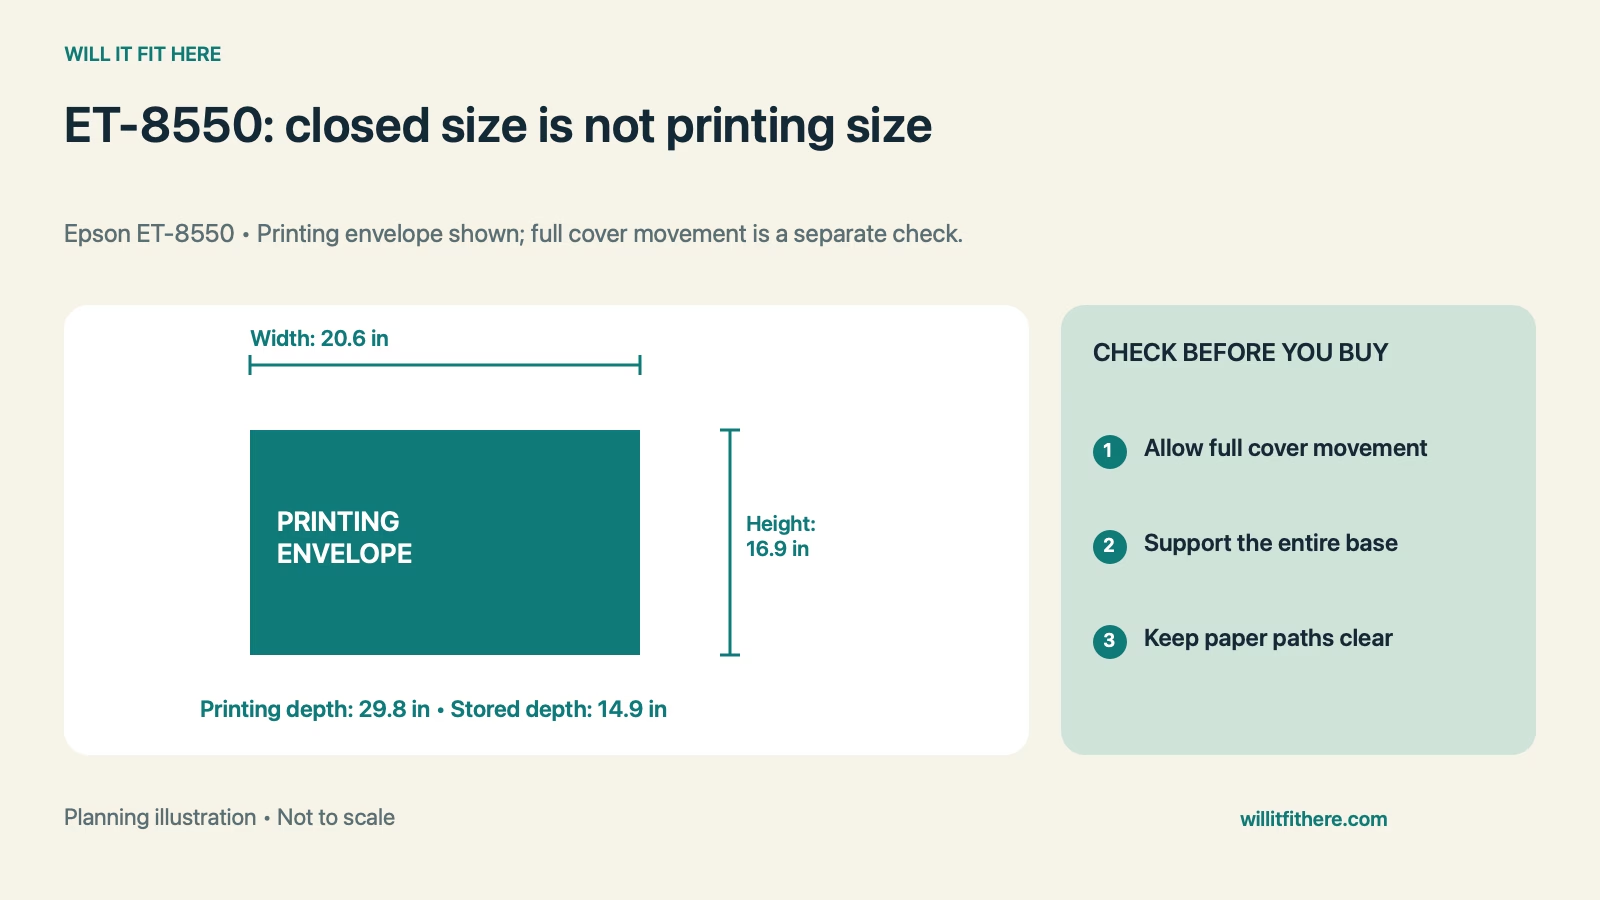
Fit verdict: Epson ET-8550 Fit on a shelf changes substantially between storage and printing. Epson lists the printer at 20.6 × 14.9 × 6.7 inches when stored and 20.6 × 29.8 × 16.9 inches for printing, in width × depth × height order. The compact closed shape is therefore a poor basis for planning an enclosed operating space. Paper loading, document-cover movement, cables, and ventilation need attention too.
This guide uses official Epson dimensions and planning calculations rather than a hands-on test. It covers the ET-8550, not the smaller ET-8500. Room sizes and extra allowances in the example are hypothetical.
Epson ET-8550 Fit: stored and printing dimensions
| Measurement | Official specification |
|---|---|
| Model covered | EcoTank Photo ET-8550 |
| Stored width × depth × height | 20.6 × 14.9 × 6.7 in |
| Printing width × depth × height | 20.6 × 29.8 × 16.9 in |
| Stored dimensions, metric | 523 × 379 × 169 mm |
| Printing dimensions, metric | 523 × 758 × 430 mm |
| Weight excluding ink and power cord | 24.5 lb / 11.1 kg |
1. Decide whether the shelf is for storage or use
Begin Epson ET-8550 Fit by defining what happens in the proposed location. A shelf that holds the closed printer is not necessarily somewhere it can print. Mark both the closed outline and the larger printing envelope. If the plan involves moving the printer before every session, check the real lifting route and supporting surfaces instead of assuming that occasional use makes the movement unimportant.
Keep the machine in its required orientation. Epson warns against tilting, standing it on its side, or turning it upside down during storage or transportation because ink may leak. A tight fit obtained by rotating the machine onto an edge is not a workable storage plan.
2. Reserve the paper path in front and behind
The 29.8-inch printing depth is an overall operating dimension, not a statement that the entire difference projects forward. Do not divide the extra depth evenly between the front and rear without examining the actual configuration. Check where the trays, supports, and chosen paper source sit relative to the back wall and shelf edge.
Trace the path of the paper you intend to use. A rear opening may be accessible in theory but difficult to load beneath an overhanging shelf. Keep the output route away from chair backs, a walking route, or another object that could intercept a print. Follow the loading procedure for the selected paper source rather than bending paper around an obstruction.
3. Check the document cover and maintenance access
Epson ET-8550 Fit under an upper shelf needs more than a comparison with the listed printing height. Epson specifically calls for room to raise the document cover fully. Check that movement on the actual unit or an applicable drawing; do not assume the printing-height figure certifies every open-cover position.
Make a separate plan for reaching the ink-filling area and any covers opened during routine maintenance. Consider your sightline and hand position, especially if the printer sits above normal desk height. If a task would require pulling the printer forward, verify stable support and cable slack throughout that movement.
4. Verify the support and surrounding air space
Use a flat, stable surface that extends beyond the base, following Epson’s instructions. Check the shelf’s rated load and installation method, including its brackets or supports. The listed bare-printer weight excludes ink and the power cord, so do not plan around a shelf capacity that merely matches that number. Include anything else stored on the same shelf.
The manual requires ventilation space and unobstructed openings. A cabinet that geometrically surrounds the printer is not automatically suitable for operation with its door closed. Avoid inventing a universal inch allowance when the relevant instructions do not provide one; inspect the actual layout and obtain clarification for a tight enclosure.
5. Reach the controls, connections, and supplies
Epson ET-8550 Fit includes using the front controls and accessing the power connection. Check whether a cabinet lip blocks the screen or whether a deep shelf forces you to reach awkwardly. Leave a workable route for connected cables, without pressing connectors into the wall. Keep the plug accessible as directed by Epson.
Give blank paper and finished prints their own nearby space.
A worked shelf calculation
Suppose a cabinet opening is 24 inches wide, 18 inches deep, and 12 inches high. Comparing the stored dimensions leaves 3.4 inches in width, 3.1 inches in depth, and 5.3 inches in height. The closed printer appears to fit geometrically, before cable and support checks.
For the published printing configuration, depth is short by 29.8 − 18 = 11.8 inches, and height is short by 16.9 − 12 = 4.9 inches. That cabinet cannot contain the listed printing envelope. Epson ET-8550 Fit here is a potential storage arrangement, not an approved printing position. An open-front shelf may allow some tray projection, but the base must remain supported and all actual paper and cover movements must be checked.
Before you decide
- Use ET-8550 dimensions, not ET-8500 figures.
- Draw both stored and printing envelopes.
- Check paper loading, output, and full cover movement.
- Verify support capacity and ventilation.
- Keep controls, cables, supplies, and maintenance areas accessible.
FAQ
Does a 15-inch-deep shelf work?
Its depth is only slightly greater than the listed stored depth. It does not by itself establish Epson ET-8550 Fit for printing or adequate base support.
Does 16.9 inches cover every open-lid position?
Do not assume so. Check full document-cover movement and routine access independently.
Can I put the printer on its side to store it?
No. Epson’s storage and transportation instructions warn against that orientation because ink may leak.
Related fit guides
For a different printer layout, see Brother HL-L2460DW shelf and paper access. For another expanding desktop device, see ScanSnap iX1600 stacker clearance.
Official sources
Specifications checked November 6, 2026. Confirm the exact article number and current installation instructions before purchase.