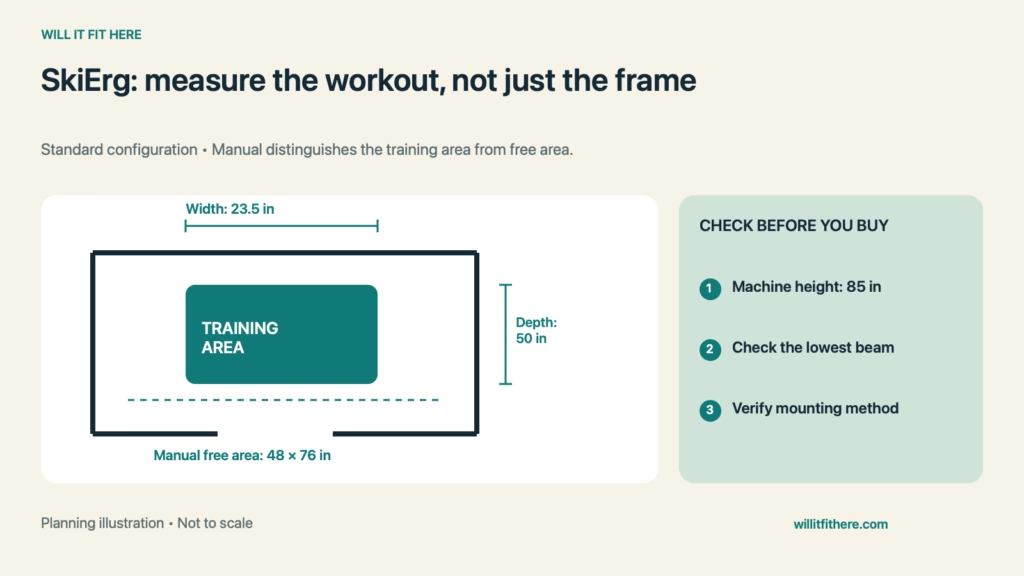
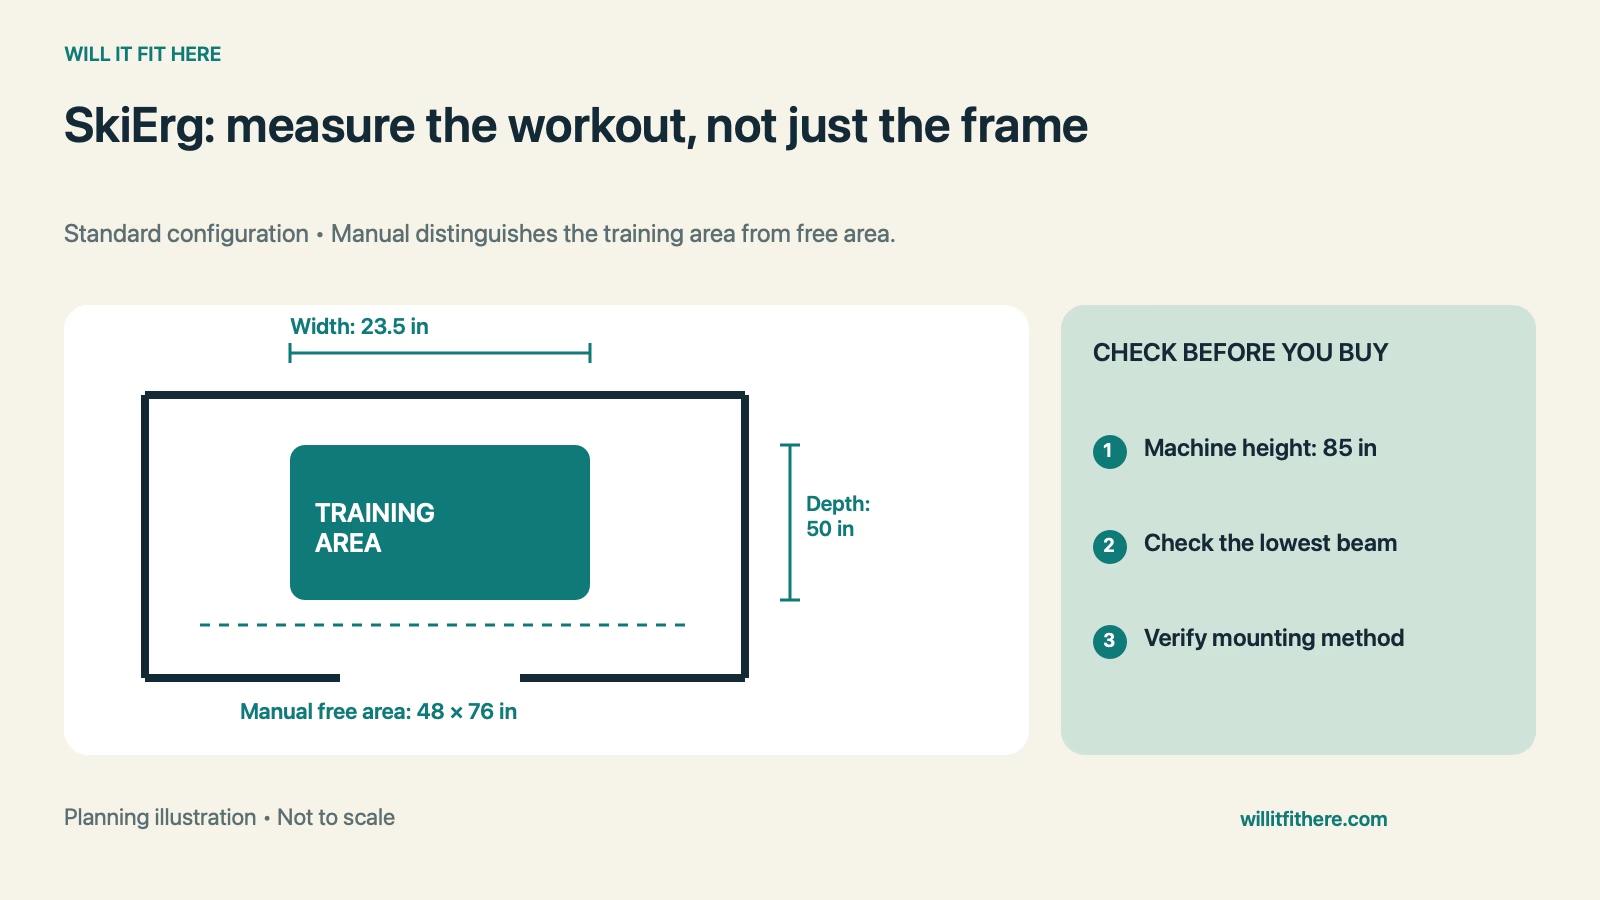
Fit verdict: SkiErg Room Fit needs more than an 85-inch ceiling and a narrow strip of wall. Concept2’s current SkiErg is 85 inches high in its wall-mounted and standard-floor-stand configurations. The product manual also distinguishes a 23.5 × 50-inch training area from a larger 48 × 76-inch free area. Plan for the person exercising and access around them, not just the machine’s metal frame.
This is an official-specification planning guide, not a firsthand installation test. It covers the SkiErg2 documentation and the standard stand. The separate wide stand is noted below because its footprint changes the comparison.
SkiErg Room Fit: machine and activity dimensions
| Measurement | Official specification |
|---|---|
| Wall-mounted maximum width × depth × height | 20.5 × 16 × 85 in |
| Wall-mounted width at bottom | 19 in |
| With standard floor stand | 23.5 × 50 × 85 in |
| Training area shown in product manual | 23.5 × 50 in |
| Free area shown in product manual | 48 × 76 in |
| With wide floor stand, product-page dimensions | 32 × 52 × 85 in |
1. Choose the mounting configuration first
A wall-mounted machine projects less far into the room while idle, but its user still occupies floor space in front. The standard floor stand provides a different installation arrangement and a larger permanent footprint. Draw the chosen version accurately before deciding whether it shares a corner with another machine. Do not use dimensions from the first-generation SkiErg for a current model.
SkiErg Room Fit for the wide floor stand needs a separate layout. Its listed width and depth differ from the standard stand, so a diagram for the narrower version cannot establish the clearance needed for your intended use.
2. Measure beneath the lowest overhead obstruction
Measure from the finished supporting surface to the lowest relevant obstruction, including a beam, pipe, light fitting, or open garage door. A nominal eight-foot ceiling is not proof of eight feet throughout the footprint. If a floor mat is planned under a freestanding installation, include its installed thickness in the height calculation. Do not assume a compressible mat disappears under the machine.
Allow for assembly and tool access as well as standing height. If the space is close, check the installation sequence with Concept2 before ordering. A machine that fits upright may still be difficult to assemble or position beneath a low beam.
3. Lay out the training and free areas
The manual shows a larger free area around the training footprint. Use that drawing when locating equipment, rather than interpreting the 16-inch wall-mounted depth as the total workout-space requirement. SkiErg Room Fit should keep nearby storage, exercise benches, and door swings out of the area needed for use and access.
Tape the planned areas onto the floor and walk around the layout. Rehearse ordinary access without pulling imaginary handles into neighboring furniture. Think about another person entering the room while it is in use. A storage cart that normally sits nearby still needs a reliable parking place elsewhere during a workout.
4. Confirm the wall or floor can support the installation
For wall mounting, follow Concept2’s installation instructions for the actual wall construction. The supplied arrangement addresses 16-inch wooden-stud spacing; other construction requires the applicable instructions and, where directed, professional advice. Do not treat plasterboard alone as equivalent to a solid mounting point. Check both upper and lower fixing positions before choosing the location.
For the floor-stand version, use a stable, level supporting surface as specified in the manual. Avoid making an uneven installation appear to fit by propping it up with improvised loose pieces. SkiErg Room Fit includes a secure installation, not merely a favorable tape-measure result.
5. Check arrival, movement, and neighboring equipment
Plan how the parts reach the room and where they will be assembled. Once assembled, the stand’s footprint and tall frame need a separate route check. Measure doors at their actual clear opening and inspect any turn immediately beyond them. A nominal door size does not include the space taken by the open leaf and hardware.
The wide stand’s 32-inch width is particularly relevant if the route has a 30-inch clear opening: it does not pass straight through while kept in that orientation. That comparison is not advice to tilt a tall assembled machine. Review the manufacturer’s movement instructions and plan an appropriate assembly location.
A worked room calculation
Imagine a room with a measured 96-inch height and a 3/4-inch mat under the standard freestanding machine. The nominal height allowance becomes 96 − 0.75 − 85 = 10.25 inches. If a duct drops to 84 inches above the original floor in the intended position, that position fails the height check despite the otherwise tall ceiling.
Suppose the proposed clear floor area is 52 × 80 inches. Against the manual’s 48 × 76-inch free-area dimensions, it has 4 inches extra along each axis in total. This SkiErg Room Fit calculation still requires using the manual’s layout, keeping access clear, and verifying the mounting conditions. It does not establish a universal exercise-room size.
Before you decide
- Identify wall mount, standard stand, or wide stand.
- Measure below beams, lights, and open doors.
- Mark both the training and free areas.
- Confirm suitable wall fixing or a stable, level floor.
- Check delivery, assembly, and any later movement route.
FAQ
Will an 84-inch ceiling work?
The current published machine height is 85 inches. An 84-inch clear height fails the stated upright-height comparison.
Does wall mounting eliminate the workout footprint?
No. SkiErg Room Fit still includes the person and the areas shown in the product manual.
Can I use the standard stand dimensions for the wide stand?
No. Use the wide stand’s actual dimensions and current instructions for the complete installation.
Related fit guides
For another home-gym machine, see Concept2 RowErg room-size planning. For overhead obstructions, see treadmill ceiling and floor-height checks.
Official sources
Specifications checked November 6, 2026. Confirm the exact article number and current installation instructions before purchase.